Right, finally I have decided to construct my own arcade cabinet. After 5 years of dreaming, I finally managed to put pen to paper and start designing my dream. I scoured the net for inspiration and found there were a lot of similar geeks like myself who have made some truly amazing cabs.
Design and Controller
I decided to build a simple cab, and used the X-Arcade joystick as the main controller and built the design round that. I went for the standard 2 player controller. I was tempted to go for the tankstci with the trackball, so I can relive moments of Missile Command but for an extra £60-70, I thought not! Maybe on the next one.
Display
I opted for a 19" LCD monitor (widescreen im afraid - again cost factor!). Considering I went for the LCD monitor and not a CRT, I did want the size of the cab to be quite imposing and instantly recognisable as a cab as opposed to a wardrobe!! I mean wheres the fun in that!
Okay so what I'm going to do do is give you a brief summary of my days spent building this monester, with some select pics, most of the pics by the way on my facebook page, so feel free to check them out. At the end of it, i'll provide a full rundown of the cost, material list and some moments of muppetry because lets face it, im winging it!!
Planning
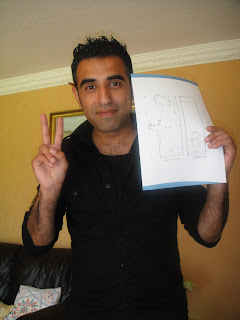
Okay as you can see in the pic, my design, if anyone wants the full spec and material list now, then let me know. I decided to construct the cab in plywood, around 18mm thick, softwood birch quality. So it was quite chunky and heavy. The main reason I chose plywood over MDF, was I just know some kind of liquid was going to spilled over it
and MDF is like a sponge. So off to the local DIY store to pick up 3 sheets of 8' x 4' plywood, 8 2m long studs, screws, hinges, cabinet hooks etc.
Game Day
Measuring, measuring and measuring - I spent a good hour
marking things out for the first side panel. I made sure the dims were 100% correct, as at £25 a sheet, and the
size of the sheet meant I dont want to be making any school boy errors!! Once all marked out, cutting the shape was pretty easy with the circular saw, although on my first attempt it nearly flew out of my hand, nearly ripping my arm out in the process....remember, hold it tight....!

The second side panel was easy after tracing from the first. Next was the base construction. As this was going to take the whole weight of the cab, it had to sturdy. Once the side panels were attached to the base and it stood up, the monitor shelf was fitted. The side panels were screwed from the inside through the studs. Most screws were done from the inside as I wanted have as few as screws as possible visible from the outside. I was fairly liberal with screws, just to make it sturdy as I wasn't using any glue. The screws were 50mm coountersink rapid screws. Now as I stood it all and breathed a sigh of relief nohting fell apart, I sat back and admired my work so far, and I was filled with excitement, it really started to look like an arcade cabinet. I even tested out the fitting of the joystick and monitor shelf and pretented.....had to done! Gaming nirvana here I come.... Not bad for half a days work I say!


No comments:
Post a Comment